Showing posts with label Creative Basic Fancy Rectangles & Layers. Show all posts

Thursday, August 17, 2017

Teacup Full Of Wishes


Hello friends today I'm featuring Teacup full of Wishes stamp along with some LDRS Dies. 
With the combination of both I created this versatile card for many occasions.


I colored my Rubber stamp with Copic markers and cut her out with the Creative Basics Fancy Rectangle & Layers die.
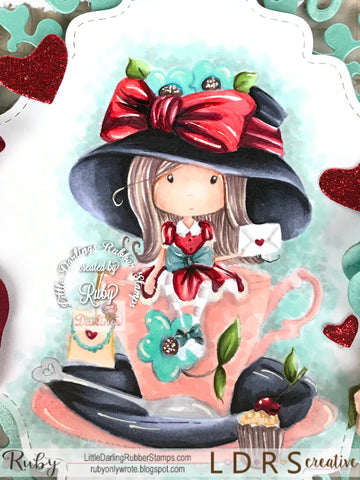


I then mounted her on this intricate elegant cut using Polkadoodles Regal Frame in a mint Aqua cut and gave them dimension so they could stand on their own very nicely and set each cut apart.

My base is Time For Tea 6x6 paper pad .... I used two different sheets. One for the pop of color and the other to simply neutralize my image and my design paper and blend it all in so nicely.
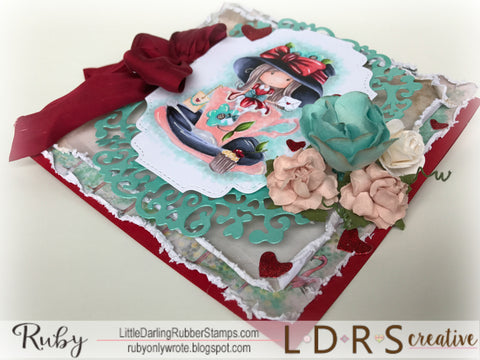


I cut some hearts from Polkadoodles Dotty Doily with sparkly red paper and adorn around my image and card.

Finished it off with a silk lush red bow. The ideas for this card are endless and can be used for many occasions.
Feel free to pick her up and give her a try at the LDRS Store.
All the items used are listed for you down below and linked directly to the product.


have a sweet day and I'll see you soon 


Wednesday, November 16, 2016

CandiBean Hand Picked For Hedgy

Hello friends yes I'm back with double post,  I'm  also featuring  CandiBean Hand Picked For Hedgy rubber stamp along with some fun LDRS Creative products.


I colored my CandiBean stamp image with Copic  markers and cut it out using the big die from the Creative Basic Fancy Rectangles & Layers. I simply mounted my image on a brown base paper using the beautiful elegant embossing folder Picnic Quilt.


I used the Summer Garden sentiment set which reads, "I imagined what my soul would look like and all I saw were flowers"
I about melted when I read this! Goes just perfect with my stamp image.


I thank you for stopping by my corner and hopefully you enjoyed my inspiration for today.
Have a lovely day


Nesting DollHouse Gatefold card

Hello friends double post today!

 We're going to start with  DollHouse Nesting Rubber stamp and Various beautiful LDRS Dies!


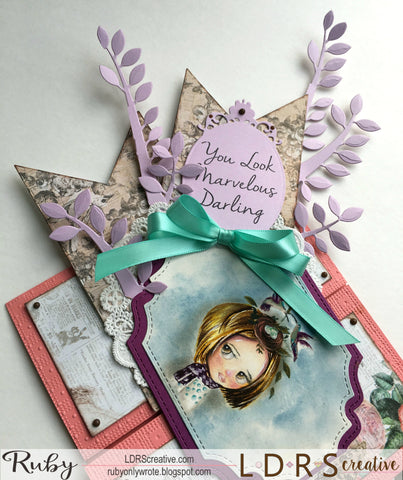
I started my process by coloring DollHouse Nesting with watercoloring markers and then cut her out using one of the large dies from the Creative Basics Fancy Rectangles &  Layers.


The Gate Fold card was my base and used my Creative Basic Picnic Quilt Embossing folders to give my doors some pretty texture.
I stamped You look Marvelous from the Uptown Sayings sentiment collection set on a Gilded Oval die cut. I then added pretty brown crystal drops to the top of the tag.
I like how you could play around with the dies and take them apart however you like.
Just like this Peaceful Dove Edge die.
I took the branches apart from the Doves then easily insert them to decorate around my my stitched flag cuts.


I added this pretty mint bow to finish it off and that was it.
I hope you enjoy this watercolored make an you could find all the products linked down below.

Look out for my next post in a bit :) 

Ruby 
LDRS Creative store Products used

Tuesday, October 18, 2016

DollHouse Chilly Daze

Welcome all I have an LDRS Creative Inspiration post featuring a NEW DollHouse Rubber stamp Chilly Daze and a few LDRS Creative Dies!


I colored DollHouse Chilly Daze with watercoloring Tombow markers , Prima watercoloring pencils and TimHoltz Distress Ink pads. I get asked what are my go to mediums and I actually like to pull various brands and I have even pulled out my copics to color on watercoloring paper which I don't do often but it's ok I have plenty of refills :)
 I say that because sometimes watercoloring paper could suck in your ink and you tend to lay more to get to your desire depth.


I used the Best Friends sentiment collection set and simply tucked it in right next to her.
I took some gear die cuts and trimmed the corners in my card using the
Key tailed Dragonfly die set. 


I then cut her using Fancy Rectangles & Layers die. I used the bigger size up to cut a pretty border to surround her. I also cut some tags to create a border in the center with the same set.
My favorite piece is that GORGEOUS picnic quilt embossing pattern in the background.
Just puts everything together.


 I hope you like my creation. This one will be displayed at CHA 2017 show for LDRS Creative. 
Thanks fro swinging by love
Rubes