Showing posts with label MIC DT. Show all posts

Tuesday, February 5, 2013

Birthday wishes with Crystal

Hey guys I'm back!  
Today I want to share a special card I  made for my sister that's been bugging me for one. I just didn't think she would want one of my cards. The other day she gave me an ear full and I felt bad so a long over due for her lol!

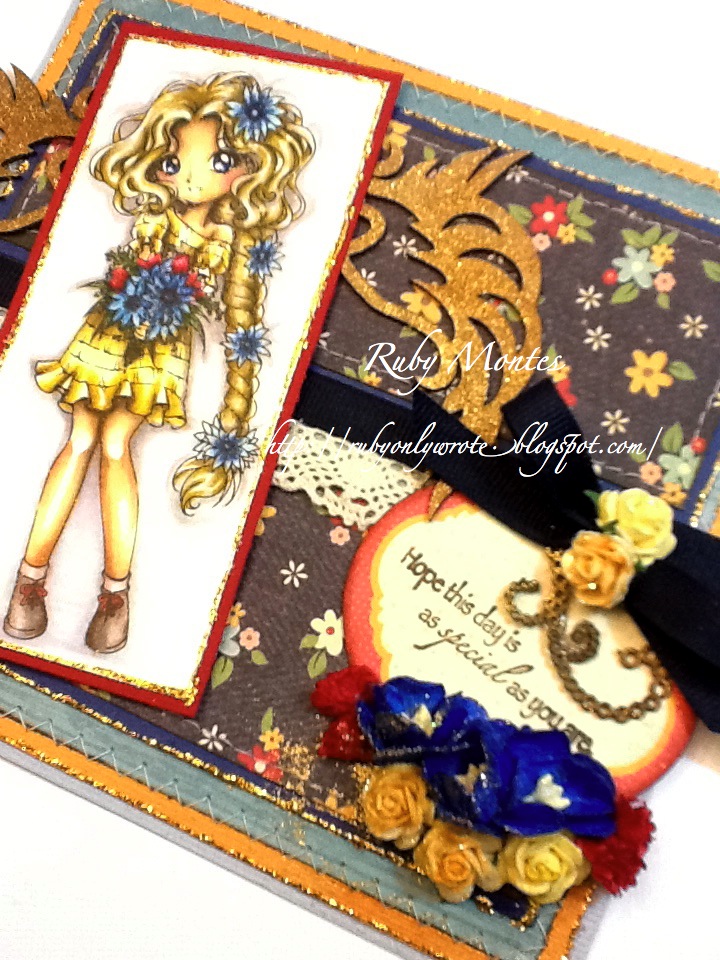
I inked up my Crystal in rubber and  decided to watercolor this time with the combo of Distress inks and Derwent watercolorinng pencils.  I layered up lots of pretty paper and with so many pretty embellishments following a pink/light chocolate mousse palette. Something I'm not use to but I like the result.

A few pictures to share.
MIC Crystal bday card


MIC Crystal bday card 2

A have a tendency to add dark shadows when I watercolor but I think that gives it a life like effect don't you think? Well thats' it for me today and hopefully will see you back soon. 

Before I Leave I need to announce

and the winner to my MIC Aussie Gumnut flower girl card is .......

SALLY!!!

This is what she said lol! and the girls from MIC helped me picked the winner without them seeing any names and I did ask them literally like two hours ago lol!

Hey Ruby - hooley dooley I reckon your card is grouse and am pretty stoked to be able to have a sticky beak at it! Now I maybe a yobbo but strewth I reckon you're a ridgy-didge aussie sheila and I aint telling no porky pie!
xxx
Sally

This is what I said......WHAT!!?!???? LOL! 

Please email me your address so I could send it off to you. If I don't hear from her by Saturday morning then I'll pick someone else and will post on the weekend. 


Make It Crafty product

Friday, January 25, 2013

MIC celebrates Australia DAY!


Aussie Aussie Aussie Oi Oi Oi!!!
 G'day cobber - thanx so much for lobbing into my place to have a squizz at what's going on.
(thanks Debbie) lol!
MIC is celebrating Australia Day and guess what we have a hop. 
If you were just swinging by my corner for a visit. Well you might wanna start the Hop with Aeryn. If your coming from my talented friend Jen than come on in you're right on track and just about done whoohooo!


Zoe has hid a big whopping prize along the hop!! How about the entire Outback Collection. So make sure you leave a comment on every blog.
I've decided to give away my card to a random commentator. Well how about you leave me some awesome Aussie slang and if I can't understand what you've said than you might just win my card, lol!

You must be a follower to qualify :)

I do have to apologize I was having camera issues and when the hop started I only had my colored image up..... Hubby fixed my old camera by just be beating it up more but It's looking like the last days are to come for that bad boy. I was looking around for a new camera /video anyways. I need to start doing my video tutes already. If you want to recommend me one please do so...... thank you!!!

Now for the info on my card. Did you see all the Gum Nut girls on the hop!??? We couldn't resist her she's so addicting to color I tell ya. Her name is Gum Nut Flower Girl and if you see the store sample HERE.... that's my coloring EEEEK!!! (HAPPY DANCE HAPPY DANCE) 

I also used the GORGEOUS Kookaburra birds sitting on a border frame of Gum nut leaves and flowers.
HAVE YOU GUYS HEARD THEM before OMG!! I couldn't stop pushing the re-play button. SOOOO Coool can't wait to show my kids the video I found HERE


Did you guys notice my DP is from the new Little Darlings Collection Summer Sorbet. I think the pink flower pattern went so perfect with the image with her pink Gum nuts. They look light pink on these pictures but their really a brighter pink,the Kookaburras are a light brown but they look white lol!
The gum nuts have a more of a pink tone too oh  and my pink/purple background is much more richer. 

You see why I need a new camera lol! O
I did color everything with my Spectrum Noir pens.

OK now to send you to the last but not least talented lady Julie. I'm sure she has some nice sweet eye candy.
Don't forget to leave me a comment oh and DIBBS TO THE WHOLE LINE UP OF THE HOP!! 
na na na :)
Ruby


Spectrum Noir recipe

Skin : EB1, EB2, FS1, FS4, FS6
Hair: CR1, CR10, OR1,TN3,TN4, DR6, DR7, EB4
Eyes: TB7,TB9, BG3
Dress: HB1, HB2,TB2, IG1, BG4
Gum nut flowers on her dress: PP1, PP2, CR4, 
Leaves:DG2, DG4
Border Gum nut flowers and leaves: FS6, DG1, DG2, JG1, JG5, CG3, DG4
Background base:PL2
Kookaburra birds: BT1, BT3, BT4, BGR2, EB1, EB2, EB7

Wednesday, November 14, 2012

A Fairy Gift For You


Hey guys I'm around but kept very busy these past days,lol! 
You see I had a bday girl this Sunday and we've been visited from family everyday to give Lauren some bday pinches :) 

We have Thanksgiving coming up and Orlando's 9th bday is also creeping around the corner.
UGHHHH not enough hours in the day I tell ya.

Anyhow If you follow the MIC store blog you had first dibs on my latest creation for the Inspiration blog. This went live on there on the 9th and like the 10th for Australia???? LOL!
Due to my busy schedule I'm just posting it here now,Yikes sorry :(

I created a pocket/Envelope card and I'm super pleased how this cute girly turned out with her blue undertone hair colored with my Spectrum Noir markers. The stocking has been dabbed with some puffy migthingy and stickles.

I also wanted to give the impression of some weight inside the stocking so I gave it it some pleats. Well attempted to color them in lol! What do you think?

For some reason I think I'm going for these colors this year. Like ice blue and chocolate or I've been thinking to go traditional with the reds and the greens. 
Don't know yet we shall see.

I mounted her on top of my bow so when you pull the inserted card she comes out with.
The Merry Christmas sentiment comes from the Warm Fuzzies Little Darlings Christmas and Winter Set.


So much fun creating this and and coloring her was just so pleasant I need to color her again!

Come on over the MIC Store to pick her up and give her some color :) 
Fair warning so much cuties released with the collection so get ready for that lol!

Thank you for stopping by and this is a busy busy month so I should have postings about every week lol! SO come back as NEW things shall be debuting very soon uhhhhhh lol! 
Have a great week guys.

Spectrum Noir Recipe
Hair: IB2, IG3, BGR2 (FS1 and EB2 were used in the front bangs)
Skin: TN1, TN2, TN7, EB1, EB2, EB3 FS1, FS6, FS8
Eyes: IB1, IB3, DG2
Flower button: TN2, TN5, TN7, EB8, IB2, BGR3
Stocking: TN2,TN5,TN7,TN8, EB5, EB8
Bow and Hair: DR1, DR5, DR6, DR7
Top and Mittens: IB1, IB3, IG3


Saturday, November 3, 2012

Make It Crafty Inspiration and Spectrum noir with tutorialal

Hey hey guys! Ruby here and my time has come to share with the MIC Inspiration blog and also on my Spectrum Noir DT.
  I have for you a little colored scene that I created using MIC Giant Flower. Everything is colored with Spectrum Noir pens and I'll be sharing the recipe down below along with a tute.

How I did it you ask? Well the background sky was a color combo blending back and forth. Nothing extremely difficult. Just playing with pens and making them blend together smoothly. The flower was fun and It did take lots of layering and blending. I wanted to give the flower a particular style with deep shading and  lots of flickering. All I did was flick from center outwards blend blend blend.

I wanted to give you a glimpse of the background scene alone beforehand.

and this is the complete scene created into a card.


 I have some pretty MIC Laser Chipboard ,"Swirly corners" and some of my pale purple flowers I colored with SN pen PL 4 purple to coordinate with my card.

I now have a tute down at the bottom, How I achieved the Undertone on this cute Mythical Nymph Toread name Flora :)

Make It Crafty Products

Spectrum Noir Recipe:
SKY Background: BT1, BT3, BT4,CT1,I G2
Flower: LV2, PL1, PL2, PL3, PL4, PL5
Stems:LY1, LG1, LG2, DG1, DG2, JG1, JG7, BG3, PL1, CT4
Ground: LG5,GB4, DG3, BG4
Mountains: TN1,TN2,TN5, EB5, EB7, GB9
Flora(sitting Image)
Skin: FS1, EB1, EB2, DG1, BLENDER
Hair: EB1, EB2, BG5, BG10
Horns: 1G1,1G2,EB2
Eyes: TB1,TB8
Dress: BT4, BT5, GT1, BGR4
Leaves on dress: LG5,CG2, FL3
Flower band on hair: TN1, FL2, LG5, CG2

***********************************

Now for the quick picture step tutorial to share!!

Do you want to know how I achieved a green undertone with pale skin coloring on Flora from the Toread line?

 This is another fun way to color skin on many stamps that portray a mythical fantasy-like image.

You can easily achieve the effect with just a few markers.
The markers you need for this tutorial are
FS1, EB1, EB2, DG1 and blender

Step 1 and 3 will be overall working on the undertone.

Step 1: Lay your undertone first with DG1, preferably where your shading is more likely to sit.


Step 2: Lay FS1 right on top of DG1 to add more depth.

Step 3: Add EB1 around the edge lines of the skin. Adding EB1 will help tone down the brightness from FS1 and keep all the other colors well muted.

For step 4 through 6  each time you lay a color you want to move to the next shade of color over less of the working area( such as highlighted parts)


Step 4 : Use DG1 To bring the undertone back.

Step 5: Pulling inward with FS1 and blender in a circular motion of highlighted areas.

Step 6: Lay EB2 around the edge lines to cast shadows.

This is the final result and I made an option of flicking small marks around the skin to add a realistic effect with CR3. I hope my method was useful and easy to understand. 

Have a great colourful weekend!

Lots of hugs and cheerful kisses
Ruby


Tuesday, September 25, 2012

Cynthia is having a good Day!

Hi there guys!!
 I have a little special card to share. I think I'm gonna have to give this another try. I was playing with sharp shadows on the gorgeous Cynthia. I might of gotten a little carried away with the shading but overall I'm satisfied with the result. Next time I think I'll keep the back shading on her left side only.

I also had to figure out the dirty blonde hair combo with my spectrum noir pens lol! I think I'm obsessed with dirty blonde hair *_*

here you can see some of the pretty gold sparkle on the chipboard wings.


I kept the shading right behind her, underneath her flowing hair, pleated dress and in between her legs.
I wish I could share a better picture of the gold glitz this card has specially the MIC Laser chip wings.
Well I hope I given you an idea where you could lay your shading on Cynthia. Mainly have fun with her and I really want to see how your take comes out.
Happy coloring.

*********************************

******************************

SPECTRUM NOIR RECIPE
SKIN: TN1,TN2,TN7, EB1, EB2 shading on face with EB2 picking up from EB3
DRESS: GB10,GB11, LY1,CT4
FLOWERS: 1B1,TB1,TB2,TB4,TB6,LY1,DG1,DG3,DR1,DR6,DR7
HAIR: BG10, EB1,EB2,BG5
SHOES: EB7,BG1,BG3,BG4
SHARP SHADOWS DONE WITH BG1, BG4,BG5,BG7

be back tomorrow for another creation so come back and check it out :)

Wednesday, September 12, 2012

Illusion of Movement

Hello!! I'm so excited to FINALLY share this posting. I won't tell you how long it's been in draft in the MIC store blog cause I'm embarrass(gulp), LOL!!!!! Maybe a month or perhaps close to two,YIKES!!

I was eager to get this image colored and share the "illusion" of this little girl jumping.
To start I colored this MIC Digi " Girlfriends skipping" with my Spectrum Noir markers. Recipe will be shared down at the bottom. 

To make the illusion that my center girl is jumping up and down is bringing her up twice on whatever software you use (I used Microsoft Word). You arrange them close to each other but the second image behind the original is the one your going to change it's transparency. Now you adjust to your liking but you want to make sure that is lighter then the original image.


Now all you have to do is to make sure that your second image is colored lighter than the first. Your blender is very handy here so make sure to blend blend blend.

I also like to eliminate the colors as I go. For example girl in center, Her shirt was colored with (Spectrum Noir) IB1,1B2,1G1 so the next image will only have a IB1 with IG1 and lots of blending and so on.

I like to add motion marks around my images to help the effect.

You could add as many images consistently lined behind the original just as long as they get lighter as the one in front.
This could definitely be done with stamping. All you have to do is
stamp your image
make sure to mask it
re-stamp behind the first image and make sure NOT to add more ink to the stamp!

Then mask that one and re do again.( I believe this is what you call second and third generation stamping If I may)

Overall you want to get to an almost no line technique. As long as you set your transparency lighter or stamp lighter you'll get the concept.

*****************************
Here are a few other cards I've done in the past with this technique.

I hope you give this a try as I assure it's not difficult at all.
Make It Crafty Image
***********************************************
 Spectrum Noir Recipe
Girl 1 (far left)
SKIN: FS1,TN2,TN3,CR3,1G1
DRESS: DR1,DR4,DR6,DR7,IG3
HAIR: EB1,EB2,EB3,EB5
Girl 2 (jumping)
SKIN: FS1,IG1,CR3,TN2,TN3
PANTS: IG1,IG4,GB11,EB1,EB2
SHIRT: 1B1,1B2,1G1
HAIR: EB3,EB5,BG2,BG5,BG6,BG7,BG8
SHOES: BT9,TB2
Girl 3(right)
SKIN: FS1,TN2,TN3,CR3,1G1
SHIRT: FS1,FS3,FS8,IG1
PANTS: BG2,BG4,BG5,BG7,BG8
SHOES: DR1,DR4,DR6,DR7
 BACKGROUND: IB1
GROUND: IG2,GG2
SHARP SHADOWS:BG4

Thanks for stopping by and as always love to hear your feedback ((smiles)) Ruby

Friday, August 24, 2012

SURPRISE HOP!!! MIC TEAM COLORING ZOE :)

UM SURPRISE It's a hop! I was heading to bed when I got the email that the hop is a "Go" so here we are LOL!!! 

Ok so are you liking the takes from my MIC buddies!!?? I see the line up and boy are we in for a treat. I better go check out to line up myself after some shut eye :)

I actually knew there was going to be a special image for my boss lady Zoe but who knew that this girlie was going to be named ZOE!!!!!! I'm so jealous.....(low voice)wish Krista had an image name after me ROTFL!!!!! 

I have to give Krista a special shout out. Dang can this girlie draw some hair! The MIC team LOOOVES coloring so when Zoe asked us who wants to color hair...WE WERE ALL RAISING HANDS LOL! I think our team is obsessed with hair conditioner lol! Oh sorry inside joke :)

Hey did you guys see my siggie from Krista Smith on my side bar!!??

 I might be wrong but I think I have the first card with her siggie. Again I might be wrong because at CHA everyone wanted to take pictures with her and I'm sure some crazy lady (besides me) asked for her autograph, lol!

Anyways lets get you hopping along here is my take.OH and  just to inform you ahem.... I am  officially a Spectrum Noir girl :) With that said I did color my girls with the Spectrum Noir markers. What do you think and yes with a bullet nib.... thank you :)


Now let me tell you why are we doing this hop :)

Zoe's excited to be releasing another colouring tutorial and it is on a topic that everyone always seems to want to improve... Colouring Hair!!† And in particular this e-book is, 'Colouring long hair in fine detail!'
Colouring Long Hair Tutorial
When Zoe was trying to decide on an image that would be perfect for this tutorial she just knew she had to contact the gorgeous Krista Smith from Saturated Canary. And... Excitingly Krista has illustrated and generously donated the perfect character exploding with big luscious hair full of layers and bumps! Just perfect for you to learn all of Zoe's little secrets to colouring finely detailed hair.
We thought it would be fun to have a little hop (and a few give aways of course) where the fabulous MiC girls and Krista have followed Zoe's tips and tricks to colouring long straight hair.
  1. Alyce
  2. Debbie
  3. Franz
  4. Sheila
  5. Krista
  6. Delphine
  7. Sandie
  8. Julie
  9. Ruby
  10. Tracy
  11. JennD
  12. Zoe
I hope you get a chance to check out the e-book and I want to inform that the steps are very easy to follow. Zoe was very detailed and her tips are well put together that you too will be doing some crazy detailed hair. With extra conditioner :)

Also Zoe teaches you how to achieve both ways I colored my images.

I'll be back to add my SN recipe. I'm quite tired and need to go rest lol!

Have fun and next enjoy my sistah Tracy!!

HUGS
Ruby

EDITED TO ADD this morning because last night I was so tired :)

I will be re-taking better pictures but that will be till later so come back and check them out at a closer angle.

Spectrum Noir RECIPE

RED HAIR ZOE
Hair: DR1,DR2,DR4,DR5,DR6,DR7
Skin: FSI,FS3,TN2,CR4
Dress: CR1,CR2,PP1

PINK PUNK ZOE
Hair: PP1,PP4,PP5,PP6,PP7,1G4 for dark shadows
Skin: FS1,EB1,EB2,CR4
Dress: All IG Family :)

Tuesday, June 26, 2012

Ardelia You're so Special!!!

Hey guys! 

I had an unexpected gathering for my bday yesterday so that's why my post was delayed.
I had a good time just hanging out at home and catching up on some needed gossip lol! jk but nooo yeah there was some done within my sisters and I, lol! We talk about 10 different topics in like 5 minutes and it goes on like that through out the night. It never seems to fail, lol! 

Thanks everybody for the warm wishes on FB and emails :) I didn't realize I had so many friends,YEAAAH!!!!!

sadly I didn't get no new crafting gadgets or anything related to crafting but no worries that will be taken care of come CHA, BAAAHAAAA!!!

All right all right to what I came here for.
I have a new creation which is my turn to share for the MIC store blog. 

I have the gorgeous Ardelia posing for us today.
I wanted to share how I created an undertone color for her skin and hair.


You could get full details on the MIC store blog under my posting but briefly the way I like to do it is a laying the undertone color first and working your way up (meaning top final layer of color of choice)
for instance on her hair I started with RV69  for the undertone so that went on first. Flickering to the center of the lock.
Next blend out with C3 right on the end of the RV69 color. Then flickering C5 on top of RV69 towards the center again and finally small touches of black for deep shading where you wish. If you don't have black you could always use your darkest C or a dark blue works perfectly too!

and here are a few pictures of the after math.


I hope you could swing by my MIC posting so you could get a full detail on my skin tip I shared there too :) 
Well that's all for me for now and I'll be back before you know it.
Thanks for taking the time to visit me and the lovely comments. 

Have a great week :)


*************************************
MIC PRODUCT

SKIN: FIRST BV02 for undertone
then E00 blending out BV02
E40 Bend out on top of both.
E000 Blend out E40 to center
highlight with R20 and R11
DRESS: BG45,BG49,BG10,R20,R24,R29,R39,Y11,Y26,Y28 AND LETRASET: 141
Flower: E00,E34,YG95,YG63,YG97,Y11,R39,R20
HAIR: RV69 UNDERTONE blend out with C3
then C5 on top of RV69 and small touches of Black where you wish for shading.
EYES: W5,T4,BG93, Letraset: W9, 313

R20,R24,R29,R39,Y11,Y26,Y28


Sunday, June 10, 2012

Glistening Scales for Melody

Hi GUYS!!

Long time no post huh?lol!

I just been hiding under a rock for a while. I've been really busy with my kids, creating for CHA,working on DT assignments and pretty much hiding out lol!

Today I get to share a scene that I've been working on for some time now. I kept it simple because the scene is busy as it is.
It was my turn to post on the MIC store blog and my challenge was to create,"Glistening Scales"

What I did was to leave several parts white and enhanced the scales with white Acrylic paint dots.Right under them I used Aqua Stickles from Ranger.Then randomly add some "Stardust" Stickles to the Tail. The copics I used on her tail was BG72,BG10,BG15 and BV00.


This is a picture of just the image before creating a card.The colouring process was done days at a time and it was more than usual because of all the small details and since I'm a mad woman always trying different things. I had to add effects here and there.Uhhh do you like the light coming out the shell.


I had a hard time capturing the glitz on her tail. This is the best I could do sorry.


This is my finish creation. Very simple and finished off with some MIC Laser chipboard Butterfly corner swirls painted and touched with stardust stickles.

Thank you for swinging on by.I have lots of work so I'm out the long list awaits me.
I need some coffee oh yeah coffee will be nice right now.

THANKS FOR THE LOVE((tight hugs))


MIC PRODUCTS USED
MIC Laser Chipboard Butterfly Swirl


Monday, March 12, 2012

I'm not Irish but Kiss me Anyways!

Good morning,

Oh boy what a weekend and it sure was a good one for me sigh...so tired though with daylight savings and all UGH!!!! not fair :(
I even forgot to schedule my post because I was out all day with my hubbie and kiddos.The whole weekend was busy busy busy.

Anywhoo until I figure out how to move my candy on top I'll leave it where it is. If you want to join on the candy scroll down or go HERE.

"Colour with Green" at Make It Colourful why not put them together, whohooo!!!

I'm showcasing Dress Up Marci  from La-La Land crafts coloured on MIC blending paper and all the chipboard on my card is from MIC :) We have the new N1 Fancy Frame chipboard decorated with pretty flowers and pearls. Also used a butterfly swirl corner  and a butterfly up on top.


 a solo shot of Dress Up Marci


Inside card pulled


I hope you could come and join both of these teams with great themes going on both.You could join MIC at their GALLERY HERE and you could join

Thanks for stopping by and will be back soon with lots more and NEW IMAGES pretty much from everybody I design for, lol! So you see I'm so busy so I best get colouring , CHEERS :)

COPIC RECIPE
Skin: E000,E00,E01,E02,E11,E13,R00,E20,E22
Hair: YR00,YR18,E11,E15,E18
Dress,Hat and Shoes: YG13,YG63,YG67,Y11
Part of dress and Necklace: R81,R83,E93,RV0000