Showing posts with label Watercoloring. Show all posts

Thursday, February 15, 2018

ConieFong Susie Sunshine


Hello, welcome back and who would of thought I will do a back to back posting lol!
Well I'm really trying to keep up with my blog.
Anywhoo, I have a ConiFong image today and this one is name Susie Sunshine.
 I  played with some Maja Design paper from the Summertime collection. I thought she coordinated very nicely with it. 
I layered a few Creative basic die cuts and Creative Basic dies by Rhea.

Keeping it clean and simple.

I watercolored her using Timholtz distress inks, Marvy watercolor markers ,Tombow watercolor makers and Nuvo watercolor pens.
I like to pick different colors from different brands just because some have different tones that I prefer at the moment.
I use Hotpressed watercoloring paper too.


Thank you for stopping in really quick and make sure you pick up your image at the Conie Fong store.
I'm already eyeing a new image to color.


Have a lovely day <3 nbsp="" p="">


Sunday, November 19, 2017

Christmas Cheer with Saturated Canary

Hello, I'm back with a Christmas scene using a Saturated Canary stamp "Parade" and some LDRS winter dies.

 It's my turn to share in the LDRS Creative Inspirational blog and this is my little Christmas cheer :)


I had a creative idea of using Parade in a scene by hand coloring a tree and whala she is now decorating her Christmas tree. The parade of animals pulling in their toys under the tree.
I watercolored my scenery with artist markers Tombow and Tim Holtz distress ink pads.
I can't get tired of coloring my SC images. Krista Smith art has always been my cup of coffee.

In case I never said it before... Love you, Krista Smith.


I used the NEW Christmas word die for my sentiment and tucked in the beautiful intricate Gilded doily die cut because it reminds me of a snowflake.
Let's not forget the Polkadoodles Winter paper pad.I couldn't pick a pattern sheet they're all so beautiful.


I tucked in the NEW Snowy Border die trim on the bottom edge. It added the nice depth to finish off my card.

I hope I gave you the inspiration to use your normal stamps and add anything winter for that perfect holiday touch. 
Add snow, a winter hat for example .... the ideas are endless. Enjoy guys :)

Have a wonderful day
Ruby


Wednesday, August 30, 2017

NEW Creative Basics dies by Rhea

Hello I have a double share today... I'm excited to get to play with my friend Rhea's NEWEST die collection Creative Basics Dies by Rhea. I mean she's really making it easier for us cardmakers/ Crafters with all these smart shortcuts and fun cuts to play with. 
My first card I created was an Easel card using Fancy Rectangles Build a Card Die set and Half double stitched Circles.


As you can see it's hard to see where the dies went to play and that's why I took a picture of my base. I actually ended up adding a third tab on the front of the card and that's
 where I added my "This Way"sign and I have a ghost cut in the middle tab. The back tab is to hold the actual coloring image and the back base.


I used the following stamps 

C.C. Designs Swiss Pixie Oct 31 Nora Rubber Stamp and 

C.C. Designs Swiss Pixie Dragon Hansel Rubber Stamp 


I watercolored them with Marvy markers and TimHoltz distress ink pads


DIES USED FOR THIS EASEL CARD


ALL PRODUCT LINKS ARE DOWN BELOW 

****************************************************

For my second card I created using Fancy Rectangles Build a Card Die set and Perfectly Layered Dotted Daisies


he was colored with COPIC Markers


I seriously loved playing with the flower die and giving it a awesome depth by layering different size cuts.


DIES USED FOR THIS CARD


I hope you enjoy my cards and I'll be back very soon.


Creative Basics Dotted Daisies Dies


Thursday, January 19, 2017

You Mean The World To Me

Hello I'm back to share a little twist using Saturated Canary Thermal Weather. Along with a list of Creative Basic Dies and LDRS Creative dies.


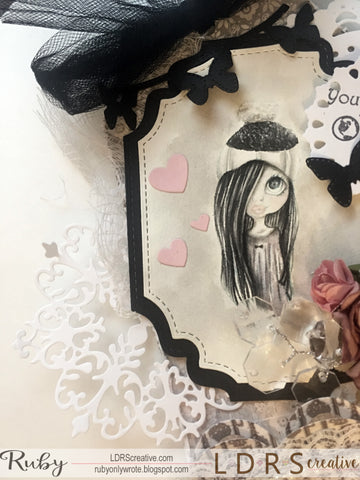
I created a fun soft tag for Valentine's Day since it's coming up. I turned a winter theme stamp image into a Valentine's theme by simply adding hearts around her and with the help of my sentiment from the "You" Collection.


Now the Process ,First I colored her with watercolors then cut her out using the Creative Basic Fancy Rectangles & Layers.I tucked in die cuts behind her like the Gilded Doily and Dewdrop circle. Now using the dewdrop die I took the smaller circle and used that one to stamp my sentiment and mount it on top with 3D glue dots.
As You can see I double on my flags.I used the Creative Basic Stitched Flags and them used the Creative Basic Picnic Quilt Embossing folder to add texture to them both.


I tucked in some lovely Creative Basic Dotted Wings on top of the tag and one by my sentiment.
Lastly the bottom border was done using the Creative Basic Cutting Edge Borders I. Cutting out a few cuts and then layering them on top of each other for a dimensional effect. I really enjoy the way that looks.

I hope I inspired you to give this a try and thank you for stopping by.
 Ruby

Friday, January 6, 2017

Hello You

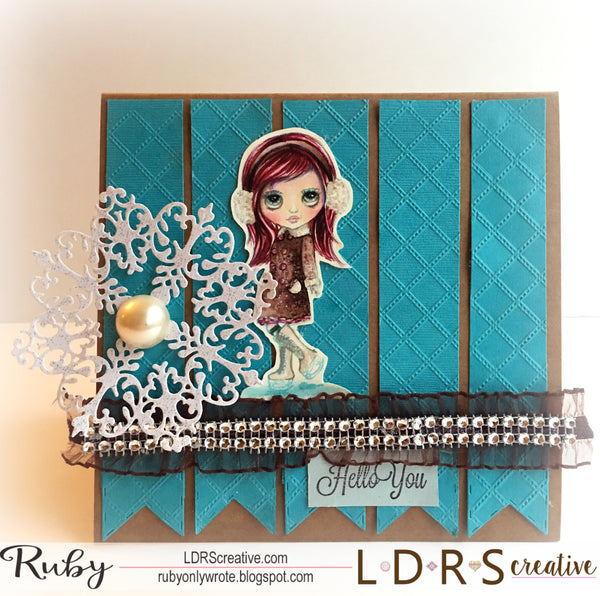
Happy New Year friends! I have the honor to share the first Inspiration post over LDRS Creative  using Chill from DollHouse and with a few LDRS Creative dies for a clean and simple card.


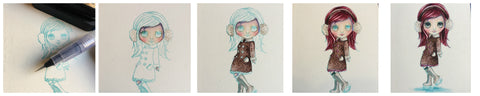
I did a quick picture by picture of my coloring process for Chill 
I watercolored her using Tim Holtz Distress Inks pads and Tombow brush pens and then easily fuzzy cut her out.


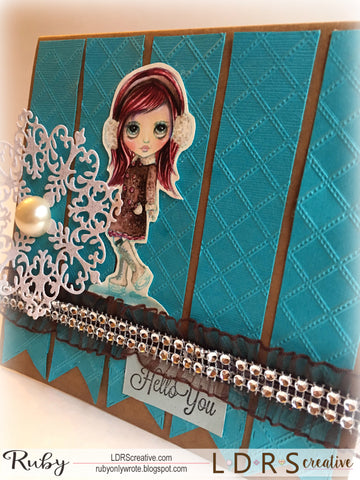
 I kept my card very basic and giving it an extra eye candy using the Creative Basic Picnic Quilt Embossing folder.
I simply cut out some strips after I embossed a sheet and added stitched flags at the bottom of the strips.

 I tucked in a "Hello You "sentiment using the You sentiment collection set.

I hope you enjoy my card and thank you all for stopping by my corner. I'm
looking forward to sharing my crafty bitz here for 2017!

XOXO
Ruby

Wednesday, July 20, 2016

You and Me Wedding Gatefold card


Sorry it's been so quiet but it's summer break and you know I'm out and about with the family. 
It saddens me to say that this will be my last creation with the Sabor Papel DT. I am so humbled and grateful for everything. They are just an excellent organization and will look forward to working with them in the future. THANK YOU GUYS!! Will miss you :)

Today I"m sharing a wedding Gate fold card using Sabor Papel's Amor Collection and this Tiddly Ink digi image You and Me.

I watercolored my image with Tim Holtz Distress Inks and Tombow markers  


 For the card base, I used Enamorado designer paper to create the Gatefold.  


I used many LDRS creative Dies to assemble my card.

My base coloring is cut out using LDRS Creative Darling Square die set.

For the bottom trim I cut out a few cuts using the Gilded Oval Die and
in the inside for the border doors I used Creative Basic Borders I with a pretty SaborPapel CS.

 Last but not least I embellished the inside by layering a sentiment tag from the Sentimientos cut apart page over a doily.

It was kept clean and simple to add any special notes or pictures.


The Amor collection is perfect for fussy cutting.  I added the fussy cut image of la novia and el novio along with the Amor Eterno sentiment.  I inked the edges of all my cuts through out the whole card for a distress look. Everything came together so nicely.

Well thank you for visiting my blog and we'll be back very soon. Maybe tomorrow lol!
Rubes 


Sunday, July 3, 2016

Gwen DollHouse

 I hope you're enjoying the Holiday weekend. Some of us just like to relax and craft :)
I enjoy coloring and take up some sun. I've been  going through a stage where I've been focusing on my coloring. A busy mom and all. One thing I can't stop doing is coloring because you probably heard it before YES,  It is therapeutic lol!


I need to color or I'll go crazy lol!
Today I'm showcasing Gwen from the DollHouse stamp collection.
I colored her with a combination of mediums from makers,pencils and watercoloring paints. I don't like to limit myself so if I think it needs another dimension I certainly reach for anything that will help me achieve what I'm looking for :) 


I used a sentiment from the Wishing You set and added stitched Flags with a simple bow. I LOVE my picture border. I used Creative Basics Background Builder I to achieve that stitched trim.


With a few pieces I created a sweet clean thoughtful card that anybody could achieve.


Wishing all my USA friends a safe holiday weekend.

Enjoy your day

Friday, June 10, 2016

Selene Greeting Farm Grad Tag


Hey peeps I'm swinging by to share my latest DT work for Sabor Papel and Passionate Paper Creations. 
With the combination of Sabor Papel cardstock and Creative Basic Dies 
my tag assembly couldn't be any more simpler :) 


I first started with this cute Digi Grad from Greeting Farm name Selene. 
I watercolored her using Tim Holtz Distress Inks. 


I then fuzzy cut her and placed her on a metallic Gold cut using  LDRS Creative Dewdrop Circle die.

I cut out a pretty back border for her using Basic Background Builders I  and I used Sabor Papel Amor /Ramitos paper for that pretty purple border.
 All was adhered down on a medallion fan fold circle  using  Papel Picado

The pink just makes everything come together and pops the image nicely.


Now for the bottom fish tail tag I used Creative Basic Stitched Flag on  Sentimientos Ole cardstock. The sentiment is just perfect for her. 
It translates ,"I wish you the best on your special day".

 and then layered them behind black sturdy cardstock.

Adding pretty black sequence on the bottom trim of the sentiment to finish it off.
I hope my tag was inspiring to you. Thank you for swinging by my corner and I'll catch you soon. Have a lovely day :)


Thursday, May 19, 2016

LDRS Creative Teams Up With Scrapbook Adhesive by 3L Day 5

 Hello I'm back with yet another collaboration Hop!
Hasn't the hop been super inspirational! I hope you enjoyed it and have taken so many ideas from all these amazing products.
Thank you everyone for joining us, it's been so much fun.
Well here I am with a sweet card using
CandiBean Rubber stamp, Take My Hand.

The process started with coloring her with TimHoltz Distress Inks. I then cut her out using a Creative Basic Pierced oval. 

The process went on with layering everything to my linking with pretty soft paper color hues and adding dept using our die cuts. With the help of thScrapbook Adhesives by 3L® it made it everything work so much easier.
My favorite touch of the card was that clear envelope with my sentiment inside. I used a clear glue dot to stick a pretty soft pink bow on top and whala it was done. What a cool embellishment to add to your projects.

My sentiment is from the NEW "You" collection set. The set is full with many brilliant thoughtful sentiments and you could use them for a variety of projects as well.
Thanks again for stopping by and have a great day.


LDRS Creative Dies

Ruby

You could find me on Instagram for exclusive coloring work in progress 

Ruby Instagram HERE


Saturday, April 30, 2016

Stampendous Hopper High


Happy weekend

Special weekend posting PPC is celebrating Spring with Stampendous!!

Make sure you join us with all the inspiration and challenges on Facebook.
I did some watercoloring to relax me from a very very busy schedule over here. 

I colored a Happy Hoppers , Hopper High.

I used Tim Holtz Distress Ink pads and Marvy watercoloring markers.

Playing and creating fur was very therapeutic. I got lost a few minutes in there lol!


The card was pretty much a simple structure. I sew the image and my base for added detail.


Playing with my Creative Basic Dies Design by my friend Rhea Weigand.
I'm a bit lucky to have these babies on my hot hands :)
Thanks for stopping by and if you follow me on FB you know what is to come.
If you don't follow me make sure to check me on FB.
I see you boo.
:)
Rubes
Happy Hoppers Hopper High


These are called Creative Basic Stitched Flags.
the ideas are endless how to use these dies and I'm very addicted to using these on all my cards lately.

I do screen request just letting you know if you're a stalker or "Other"
I'll see you soon


Basic Stitched Flags


Saturday, April 16, 2016

All Dress Up Little Flower Girl


Welcome back to my corner. 
Today I'm showcasing a very pretty
 little girl from All Dressed Up Stamps. 

This is Little Flower girl and I have watercolored using TimHoltz Distress ink pads and reinkers. 


Many fun dies went into the card assembly. Starting with the Creative Basics dies from my bestie friend Rhea Weigand. 

I used Cutting edge Borders to create the fun curve on top with the black layer paper


I tucked in some Stitched Flags using different pattern paper and cut a Basic pierced oval and added the LDRS Creative Gilded Oval Die to it too.


I closed the deal with this lushious deep Red satin bow from Ribbon Resource. I AM IN LOVE WITH THIS RIBBON SERIOUSLY!

Thanks for swinging by and I'll be back soon. Have a fun Sunday!

XX


Basic Pierced Ovals 
Cutting Edge Borders I
Basic Stitched Flag